Difference between revisions of "IBHLink S5++:SIMATIC® S5 Elipse SCADA"
| Line 41: | Line 41: | ||
Enter the IP Address of the IBH LinkS5 ++ and choose port 102:<br /> | Enter the IP Address of the IBH LinkS5 ++ and choose port 102:<br /> | ||
| − | [[Image:Elipse_driver_settings_ethernet.png|456px]] | + | [[Image:Elipse_driver_settings_ethernet.png|456px]]<br /> |
| − | + | ||
Now the '''N''' an '''P''' Parameters must be set. The description you'll find within the helpfile '''<mprot_us.chm>'''<br /> | Now the '''N''' an '''P''' Parameters must be set. The description you'll find within the helpfile '''<mprot_us.chm>'''<br /> | ||
In the sample DB1.DB0 is chosen:<br /> | In the sample DB1.DB0 is chosen:<br /> | ||
Revision as of 15:21, 18 June 2012
It is possible to realize a connection from a PC with Elipse SCADA to a S7-300/400 station over ethernet using an IBHLink S7++ as gateway.
Example
In the following example a configuration with Elipse SCADA is shown. The HMI station is connected to the IBHLink S7++ via an Ethernet connection. The IBHLink S7++ itself is connected to a S7-300/S7-400 station by MPI or PROFIBUS. Bus parameters were configured by the IBHNet configuration tool.
The following addresses were chosen in the example:
IP addresses: IP addresses:
| Station | Address |
|---|---|
| HMI station | 192.168.10.122 |
| IBHLink S5++ | 192.168.10.125 |
Operation with S7 HMI devices: For the operation with S7 HMI devices the following settings need to be made:
| IP address of the PLC | IP address of the IBH Link S5++ |
| Rack number of the PLC | 0 |
| Slot number of the PLC | 2 |
| MPI® address of the PLC | 2 |
Configuration:
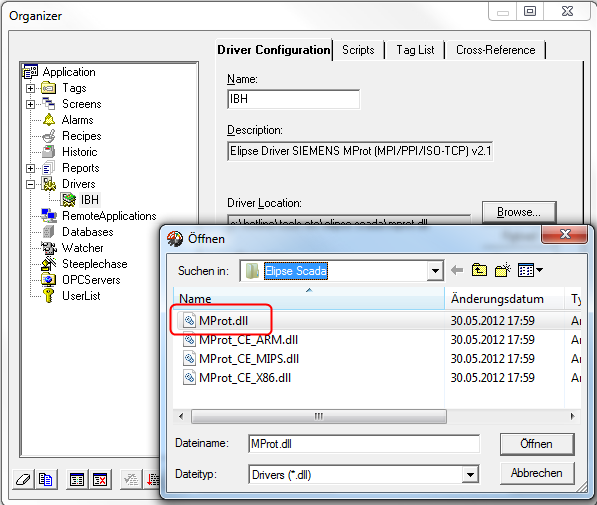
The ethernet communication driver for S7-300/400 named MProt.dll must be selected witin the Application Organizer:
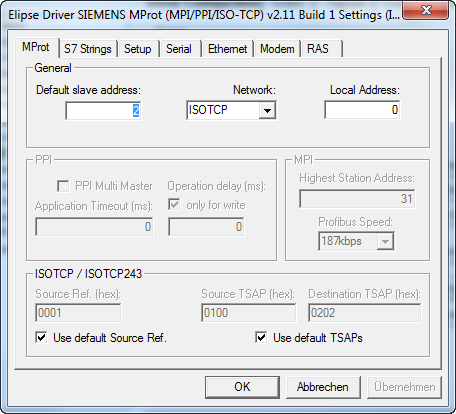
Within the MProt settings the MPI/DP address of the PLC has to be entered as <Default slave address>
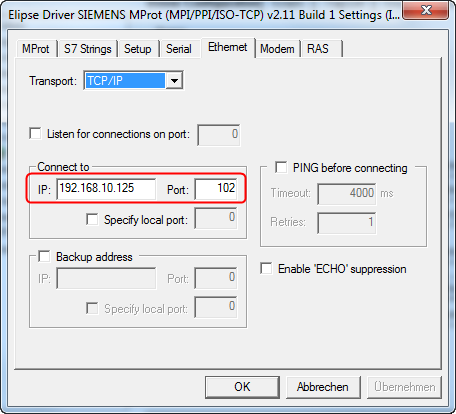
Enter the IP Address of the IBH LinkS5 ++ and choose port 102:
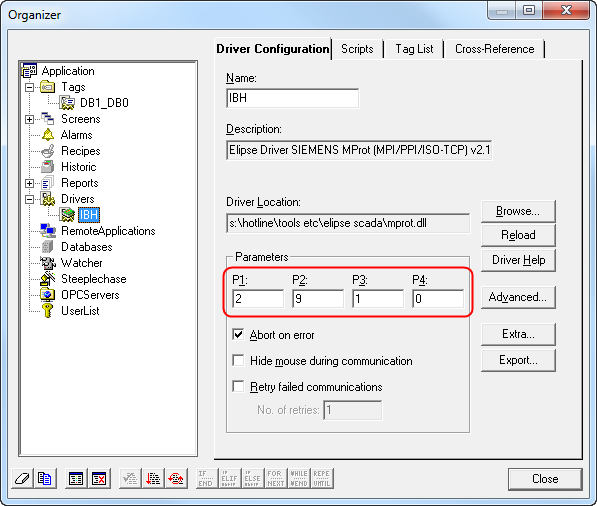
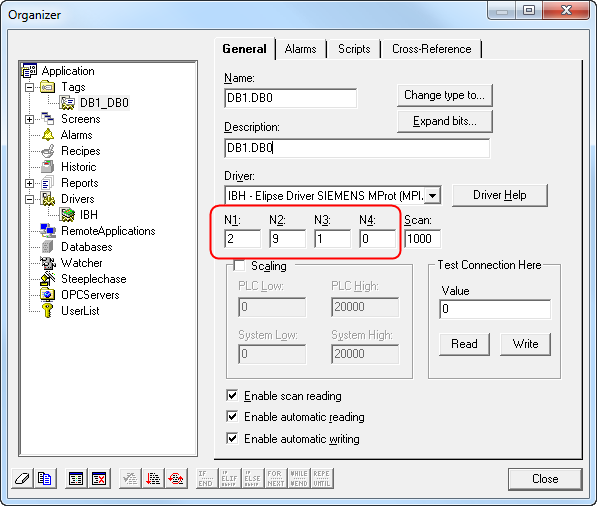
Now the N an P Parameters must be set. The description you'll find within the helpfile <mprot_us.chm>
In the sample DB1.DB0 is chosen:
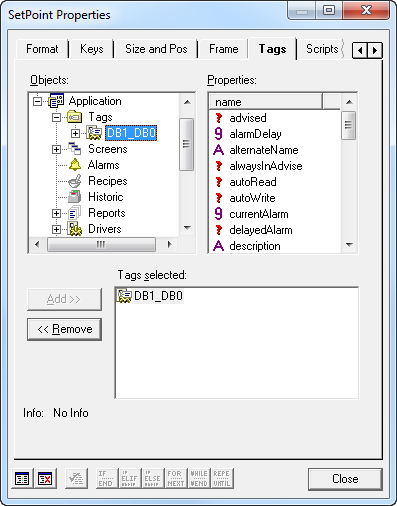
The configuration is now completed and the Tags can be used:
