IBHNet:Using IBHNet with WinCC
From IBHsoftec Wiki English
Using the IBHNet driver with WinCC
To use the IBHNet driver with WinCC, please follow the instructions step by step.
- Install WinCC and make sure, the installation was successful.
- Now install the IBHNet driver.
- Configure the IBH Link and specify the the PLC Names and their connections.
- From the control panel open the "Set PG/PC interface" dialogbox and select "IBHNet (MPI®)". In the properties dialog choose the previously configured PLC.
- Use some programming software to make sure that the connected PLC is available. If no programming software is available, the Visual Basic samples that come with the driver may be used for testing. The samples may be found in "C:\IBH softec GmbH\IBH_Net\samples".
- Now we are sure the PLC is available. Start WinCC and create a new project.
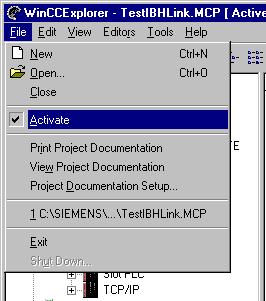
- To make configuration changes, the project must not be active. Make sure to deactivate the project.
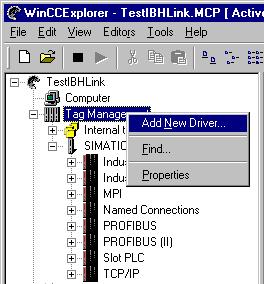
- Highlight the "Tag Manager" and right click. From the context menu, select "Add New Driver".
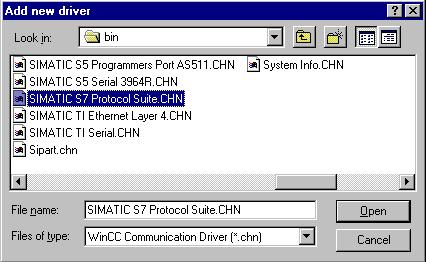
- From the list the driver "SIMATIC S7 Protocol Suite.CHN" needs to be chosen.
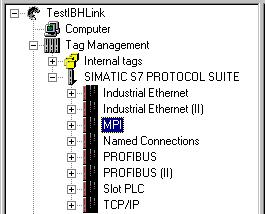
- After selecting the driver, the communicatione listed below are available. Please select the branch "MPI".
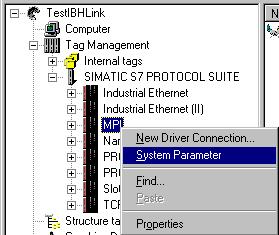
- Before a PLC may be added, the communication parameters need to be set. Right clicking the branch "MPI" opens a context menu. Select "System Parameter".
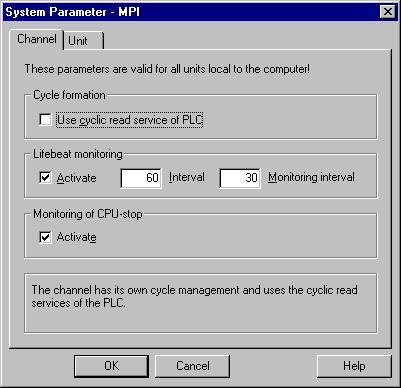
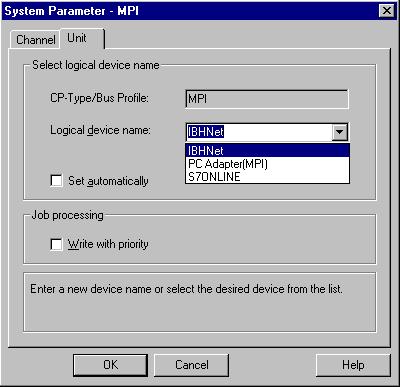
- Now set the communication parameters as shown in the two screens below. In the register "Unit" now the driver "IBHNet (MPI®)" may be chosen. Please make sure to assign a PLC via "Set PG-PC interface" from the control panel.
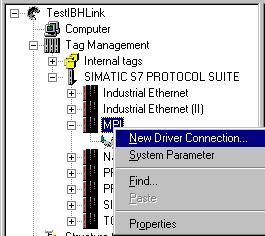
- To create a PLC, "MPI" needs to be highlighted again. From the context menu, choose "New Driver Connection".
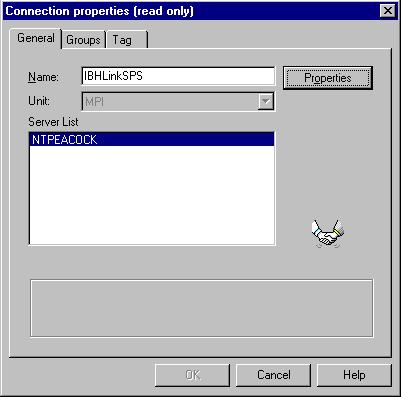
- In next dialog a name may be entered for the PLC. WinCC will use this name.
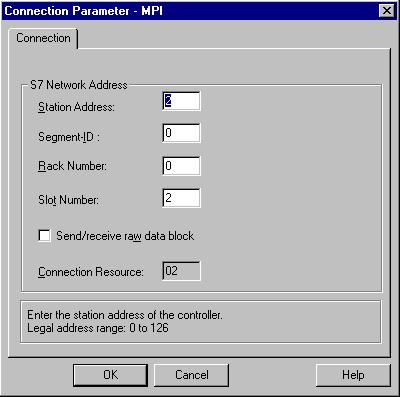
- After the PLC has a name, the "Properties" needs to be opened. Here the MPI® address and Rack/Slot nubers of the CPU need to be entered. In the sample a PLC on rack 0, slot 2 with the MPI® address 2 is used. Disable the option "Send/Receive raw data block".
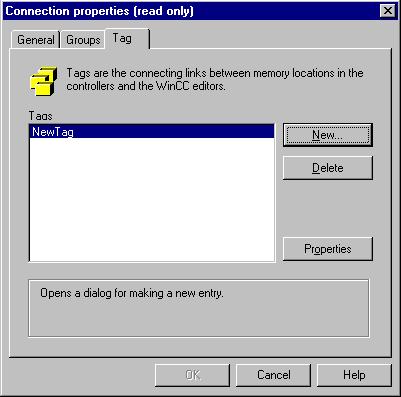
- Now variables for WinCC may be entered. Save your project and verify your settings after restarting the project.
- In case of questions and/or comments, please contact our product support.
